Increase Max Upload Size in All-in-One WP Migration Plugin
The All-in-One WP Migration plugin is a powerful tool that simplifies the process of migrating WordPress websites from one server to another.
However, one common challenge users face is the limitation on the maximum upload size for migration files.

Step-by-Step Guide to Increase Max Upload Size in WP Migration
This can be especially troublesome when dealing with large websites. Fortunately, there’s a solution. By installing a modified version of the plugin from GitHub, you can increase the max upload size and seamlessly migrate your WordPress site. In this article, we’ll guide you through the process step by step.
Step 1: Download the Modified Plugin:
- Open your web browser and navigate to the GitHub repository containing the modified plugin: https://github.com/kashifmahmood47/All-In-One-WP-Migration-With-Import
- Click on the green “Code” button and select “Download ZIP.” This will download a compressed file containing the plugin files to your computer.
Step 2: Install the Modified Plugin:
- Log in to your WordPress dashboard.
- In the left-hand menu, navigate to “Plugins” and click on “Add New.”
- Click on the “Upload Plugin” button at the top of the page.
- Choose the ZIP file you downloaded from GitHub and click “Install Now.”
- After the plugin is installed, click the “Activate” button to enable it on your WordPress site.
Step 3: Adjust Max Upload Size:
- Once the modified plugin is activated, navigate to the “All-in-One WP Migration” settings in your WordPress dashboard.
- Click on the “Import” or “Export” tab, depending on whether you’re importing or exporting your site.
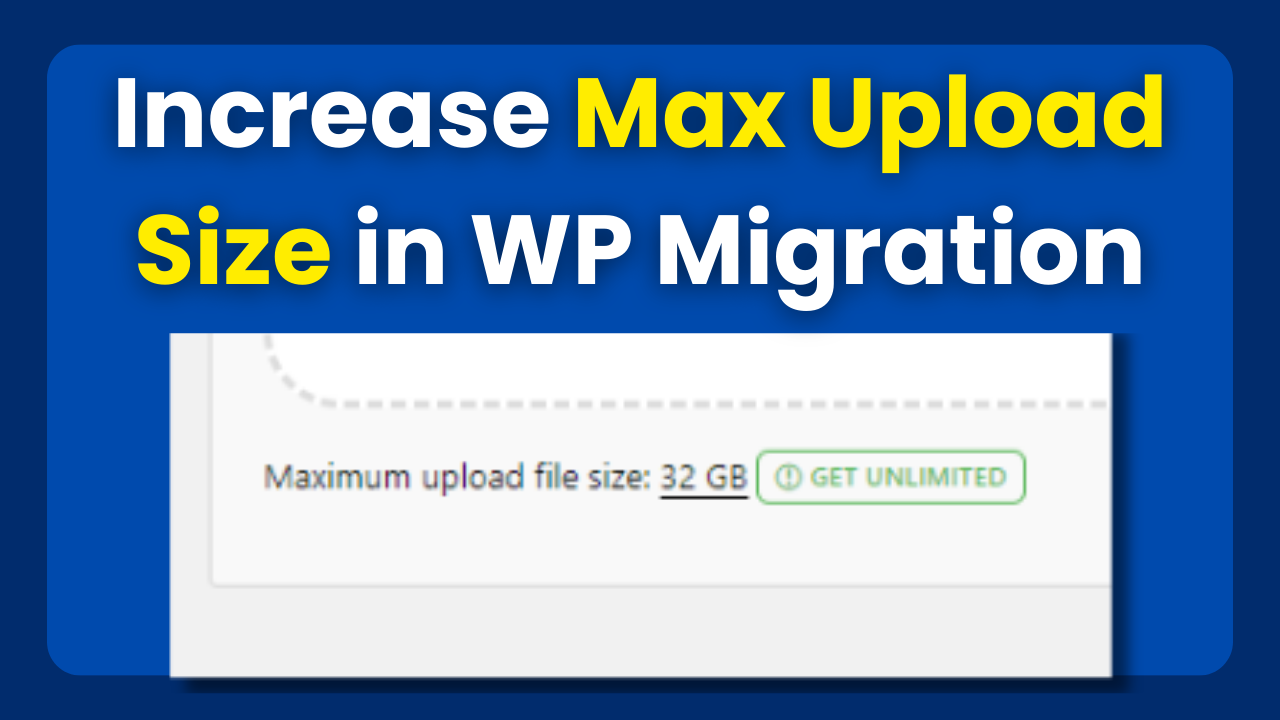
- You will now see an increased maximum upload size, allowing you to work with larger migration files.
Step 4: Migrate Your Website:
- With the increased max upload size, you can now proceed with the migration process as usual.
- If you’re exporting a site, go to the “Export” tab, create a backup of your website, and download the .wpress migration file.
- If you’re importing a site, go to the “Import” tab and upload the .wpress migration file you previously exported.
- Follow the prompts to complete the migration. The increased max upload size will ensure a smoother transfer of larger website files.
Step 5: Test and Verify:
- After the migration is complete, thoroughly test your website to ensure all elements, links, and functionalities are working correctly.
- Verify that all images, media files, and plugins have been properly transferred.
Final Thoughts on Increasing Max Upload Size in the All-in-One WP Migration plugin:
Increasing the maximum upload size in the All-in-One WP Migration plugin using the modified version from GitHub can significantly simplify the migration process for larger WordPress websites. By following the steps outlined in this guide, you can overcome the limitations of the default plugin and ensure a smooth and successful migration experience. Remember that while this modified version allows for larger file uploads, it’s essential to keep your site’s performance and server capabilities in mind when dealing with extensive data transfers. Always backup your site and proceed with caution when making modifications to your WordPress installation.